Friday, April 27, 2012

Stripes


Here is our hallway.

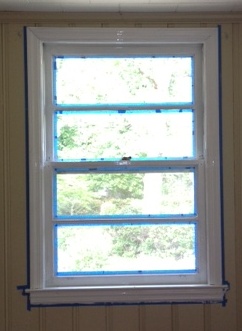
What it looked like when we moved in:


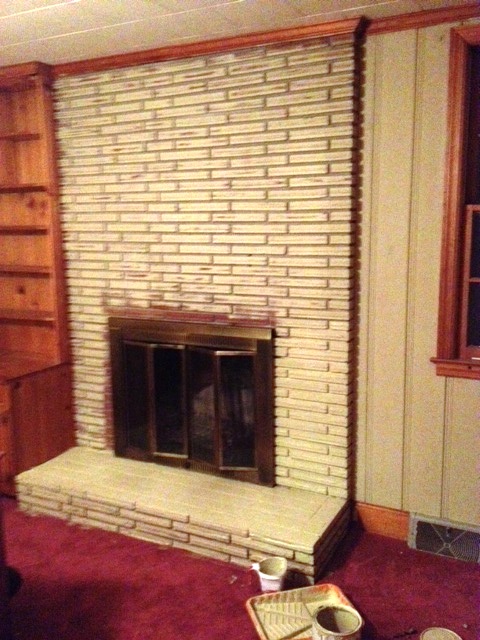
 After wallpaper removal


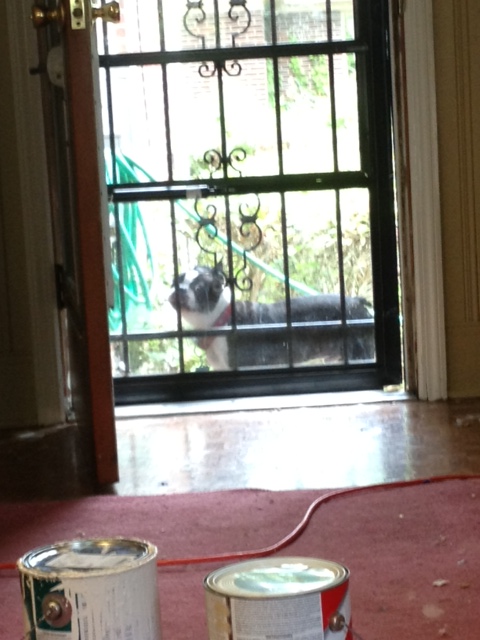
Carpet removed and wall painted Sherwin Williams Moderate White

So last night, while I had about a zillon things on my to-do list, I decided I wanted to take on a fun project and add some spice to our hallway. I stumbled across the picture below on Pinterest.

Pinned Image
(photo from abode love)

As a new home-owner, I don't think I'm ready to do go quite as bold and paint my whole hallway in stripes but I thought that the wall between the master & guest bed room might be a fun accent wall. While Stevens was at a baseball game, I got out some tools, sushi, glass of wine and got to work!

The tools I used were a tape measure, a yard stick, Frog tape, razorblade, a level, and a pen.


I measured the wall to see how thick I should make the stripes.  The above inspiration photo has 5 inch stripes.  The wall measured out to 90 inches from top to bottom so I went with 5 inch stripes.


Taping out these stripes takes a lot of patience, talking to yourself, and having to stop and think about which stripe you are on. The tape goes over the stripe that you are leaving the wall color.
And then the stripe you paint has to be the full 5 inches. 

Because the space I was painting was so small, I would measure out each side then tape and double check with a level.  I also marked each stripe that was I leaving the wall color with a scrap piece of tape - makes it so easy identify which stripes you are painting.  

Finished product! Not sure if this will be permanent or not, took me about an hour and a half to do and the future hubby hasn't seen it yet.  We will see what he thinks!!

Frog tape is amazing!! But will leak if you use oil base paint.  For latex just firmly press around the tape before you paint and remove before the paint dries.  There was very minimal touch-up and the lines are very clean!

Thank you for reading!

Wednesday, April 25, 2012

Wooden Wonderland

One of the projects that Stevens is itching to have all set up  is the den (I'm ok with the tv staying out for a while to ensure that we still get some work done!!) but we completely transformed this space and we are so happy with the progress we have made. Wooden panel dens are very common in our area and more and more you see people painting them.  It drastically changes the look of the entire space so some are more hesitant to paint.  A few weekends ago, we decided to go for it.

We only have two windows in this room so it was very dark originally.  Much like the fireplace, this was one of those decisions where you just have to jump in and go for it.  


We used this primer and had it tinted with Sherwin Williams, Macadamia.

Stevens started with the roller but we quickly realized that you need to paint all of the crevices with a smaller paint brush, a 1 1/2 or 2 inch brush works perfectly.  We rolled the flat panels and hand painted the seams.  The tinted primer really helped us in the number of coats.  Because wood paneling really soaks up paint, we did one coat of primer and two coats of paint.
We hesitated on the trim, debating whether to paint it in the alabaster color, the color of the trim throughout, or the same colors as the walls.  We decided to continue with the Macadamia because adding white would really chop up the room and make it look smaller. 

However we did paint the windows and the doors Alabaster.


 We still have some to-do's in the den:
- pick out carpet
- finish bookshelf
- & decorate!

Thanks for reading :)

Tuesday, April 17, 2012

Painting Brick

 We decided to take a huge leap of faith and paint the wood paneling in our den to give the room an updated and more modern look - it was one of those decisions we had to be sure about because there was no going back.  If you look back at the paint post , you can see where we choose Sherwin Williams Paint Strip 21 and used the top 3 colors.

For the den, we used the third color down - Sherwin Williams Macadamia. Painting the den was one story but for now we will talk about the fireplace. 

We took off the antique wooden mantel and it revealed some pretty ugly brick. (Side Note - This mantel came from an antique dealer and we are looking to sell it if anyone is interested!!) The bricks were long, skinny, and flat and for some reason they were stacked on their sides the edges poking out to make texture.  We decided to paint the fireplace the same colors of the wall so it would blend in and not stand out so much. 

So here are your steps for painting bricks:
- Clean (by hand or with vacumm)
- Prime with a 2 in 1 primer
- Paint
- Enjoy your new fireplace!


This was much easier than we thought and very much a room-changer! To prep the bricks I did some blog research and hunted on google;  most people said to wash the bricks with thick sponge or cloth to remove any dirt, dust, soot, or cobwebs. We started to wash them but it was really hard to get into all the creases with a sponge and it hurt your fingers to do it with a rag. So we pulled out the shop-vac and vacuumed!

We asked the kind folks at Home Depot what we should use to paint bricks and they recommended Zinsser Cover Stain Oil Base.  This is a tintable primer so we had them tint it to the Macadamia color so we wouldn't have to do so many coats. (Even though it was oil based because brick is porous you can use an oil based primer & paint latex on top. )
After primer:
ONE coat of paint:
The only tedious step was taking a brush and painting all of the mortar between the bricks. No where online mentioned this step but it was must! We also had to use a small artist paintbrush to fill in the spaces that were right next to the bookcase.  And that's it - just 3 simple steps - clean, prime & paint!

Now all we have to do is find a mantel; here are some inspiration ideas!!

Thanks for reading!

Monday, April 16, 2012

Some Kind of Wonderful

Our weekend consisted of:
- Stevens fixing the master bathroom sink! Can't wait for the big reveal! The sink wasn't installed properly so changing the faucet required redoing some of the pipes
So proud of him for becoming such a Mr. Fix-it!

- 2 trips to Lowes 
 (we failed to notice minor details like square outlets need square covers)

- Picking out sconces for the bathroom


 - Watching Winston for the weekend. Cried when he was inside and when he was out.


 - knocking over a gallon of paint and not noticing it until a HUGE puddle was on the floor. Thank goodness we are not keeping the carpet!


- finished trim in the master bedroom

- first coat of trim on windows and doors in den

- found out that you can't leave up painters tape between coats of oil paint, it acts like a glue and tape will come off in tiny strips causing you to get very angry and use choice language.
(Hint: it will come off, its just better to take off when paint is still wet.  If it does dry, you can cut it off with a razor blade!)


Most importantly we had a productive yet enjoyable weekend with lots of laughter and even some dancing! Highly recommend "Darius Rucker", "Van Morrison" & "I Love Beach Music" Stations on Pandora.  Thank you for reading!!

Wednesday, April 11, 2012

Premature Grey?!?

As I was driving to go eat lunch with a friend, I glanced up in the rearview mirror and saw this:
With the all of the house preparations and wedding planning, it has been stressful but never thought I would have grey hair would spring up! I was ready to book a meeting with my hair stylist stat and then realized that it isn't grey hair, it was PAINT! We have been a busy bees working on the trim in the house and got paint in my hair on accident!
Bottom is repainted and the right door frame is what all the trim in the house looks like.  Very excited for a fresh new, clean look! Thank you for reading!

Monday, April 9, 2012

Picking Paint

Once the wallpaper was stripped we learned a lot about paint.  I have always loved looking through Pottery Barn and Ballard Designs magazines and we both loved the idea of neutral walls.  We was shocked when we discovered that there are TONS of options when it comes to a "neutral" color.  Warm tones? Cool tones? Hint of blue? Hint of lavender? Brown undertones? Its enough to make your head spin!! We asked for help from a friend who really knows her stuff and decided to go with Sherwin Williams Strip 21.

These are the first three colors down the paint strip


I saw in a magazine where you should be able to take all of the paint chip colors for your house, throw them in a pile, and they should all compliment each other.  So for our master bedroom, we wanted something that would go with the the colors above as well as the master bathroom.  We were thinking a shade of blue but we didn't want it to be too matchy-matchy with the blue bathroom tile.

 Obsessed with this color! Think it will be great with some grey accents.  Comes off as a power blue with green undertones  - reminds me of a Charleston coastal blue!


Buying paint was a whole different story - during our first trip we had to call/text friends or family to help us every time the nice people at Sherwin Williams asked us a question.  We just thought you walked in said I want this color and they mix it up for you, WRONG! We had no clue when it came to matte/flat, eggshell, satin, semigloss, gloss, oil, latex.
This can is all over our house.  We used it for every wall color. We also chose an eggshell finish, which means it has a hint of sheen or gloss to the color, in an acrylic latex.  This is a pretty standard for painting walls.  

We soon realized all the trim needed to be done as well, although it was a creamy color it had a yellow hint to it due to age. However, we had to use oil base paint because the trim was previously painted in oil.  We found out that you can't  use a latex base paint on top of oil or it will peel and flake off very easily. Oil semigloss paint has a very pretty finish making your trim look like it shines! The down side to oil based paint is that it is like painting with molasses.  Its very thick and having paint thinner within reach is a must because once it touches or drips on something - it stays! Oil based paint also sticks to your skin and doesn't wipe off easily.  If it gets on you, wipe immediately or will be stuck - washing it with water does not help, as they say oil & water don't mix!
We also painted the ceilings white with just basic paint from Lowe's - they also had a hint of yellow. Before painting we used a primer and then two coats of everycolor on each of the walls. 
Highly recommend this primer.  Its in the medium range for price and does a great job. Hope this will help you from walking into a paint store and not feeling dumb like we did! Thanks for reading!

Friday, April 6, 2012

Master Bathroom

As you could see from the first post, our cute house was precious on the outside but caught in the 80's/early 90's on the inside. The color scheme was country blue, mauve pink, burgundy, and navy.  It really took some vision to realize what we could do with the place.  When we first looked at the house, my sister and I were overjoyed and so excited about the potential.  On the other hand, my fiance took a big deep breath and decided to go check out the yard. 

It was very overwhelming when we first really started to took at the house.  Every window treatment had THREE curtain rods to display all of the wonderful bows, flowers, draping work and curtains - ALL handmade by the sweet lady who owned the home before us. Almost every room was covered in floral wallpaper - not just the wallpaper but chair rails and boarders to match. Thanks to my future mother in law who was able to resell almost all of the curtains!!

One (almost) finished project is the master bathroom.
The bathroom had a large diamond mirror, wallpaper with a border and 3 panels of curtains on the windows and over the shower - look to the left to get a glimpse!
 
The vanity continued with the diamond feel and here you can see the tile of the floors - we are very lucky because other houses in the neighborhood had mint green, bubble pink or dark chocolate brown.
 No 1980's home is complete without a wooden seat!

We picked out our paint colors and decided to strip the wallpaper in this bath and paint it a color that would compliment the tile as well as the master bedroom. At this point, we were pros's in the wallpaper removal process. The living room, dining room, all bedrooms, hallway and kitchen were completed in one weekend - best tip we received was to go rent an industrial steamer - this will really help save time and energy. 

However when we got to this bathroom, the wallpaper started ripping off the wall.  We quickly discovered we had sheet rock and part of the wall was coming off with the wallpaper. We tried different areas but finally decided that we could either 1) take off all the paper, then spackle and sand the whole bathroom to make it smooth or 2)  lay wallpaper on top.  Its fairly simple to spackle small areas to recover and paint but trying to get a whole bathroom smooth was going to be quite the challenge! Tip for spackling: to make sure its smooth, after sanding, close your eyes and run your hand over the area you shouldn't be able to feel a different in the area you fixed and the wall if you do, it you can feel you can see it when you paint!
We patched up everywhere we had tried to peel the wallpaper and decided to rewallpaper the walls.
I repainted the vanity the same color as the trim (Sherwin Williams Semigloss Oil in Alabaster)
 And here are the new walls!! I'm obsessed with the new wallpaper.  Its a dark slate gray and the white is actually painted on and has a bit of texture. I think the contrast will be great with a crisp white shower curtain and white rugs.

 We  found a large mirror at a local thrift store and had it cut to fit the wall.  It rests on the counter edge and comes 16 inches from the ceiling.  We had two holes cut into the mirror so we can add our new sconces directly onto the mirror. Finding the mirror and then having it cut was a big price saver than going to a company and requesting a custom mirror.  Most thrift stores will have a pile of old large bathroom mirrors.

Before                                                    After
(I guess we need to get better at taking pictures of mirrors!)
We still have to update all of the fixtures, finish the trim and then decorate. But we hope that you enjoyed our bathroom re-do. Thank you for reading!